Showing posts with label everyday food. Show all posts

Thursday, April 07, 2011

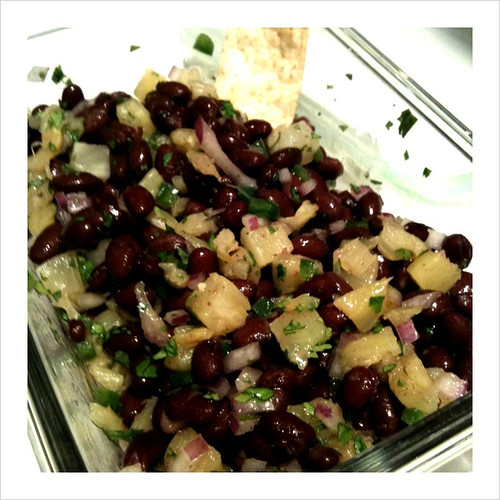
Pineapple and Black Bean Salsa

My taco kick continues, as last night I made fish tacos using this recipe and some trout we received from the father-in-law. Kept things pretty much the same as the shrimp tacos I shared last week- slaw, pico, sour cream, and feta topped things off again, but this time with a few dashes of hot sauce instead of leftover marinade. On the side I served up this Pineapple and Black Bean Salsa with some tortilla chips. I came across this recipe in the March 2011 issue of Everyday Food, in their feature on pineapple (which is also where I found the recipe for the Jerk Pineapple Pork Chops I recently shared). This made a really light and flavorful accompaniment to our fish tacos. I've got some leftovers in the fridge that I'll definitely be enjoying over the weekend.

Pineapple and Black Bean Salsa
Recipe from Everyday Food; Makes 4 cups
Pineapple Salsa

1 can (15.5 ounces) black beans, rinsed and drained
1 1/2 cups chopped pineapple
1 jalapeno, stemmed, seeded, and minced
3 tablespoons finely chopped red onion
1/4 cup chopped fresh cilantro
1 tablespoon fresh lime juice
Coarse salt
  • In a medium bowl, combine black beans, pineapple, jalapeno, red onion, cilantro, and lime juice. Season with salt.
My notes: I kind of eyeballed the red onion and cilantro and things worked out just fine. This could also be good served over rice on the side of some fish or chicken, I think.

Tuesday, January 11, 2011

Laying all the Recipe Cards on the Table

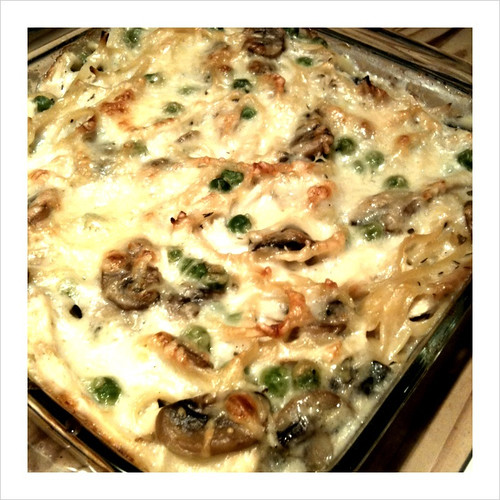
Sorry that I haven't been around for a while. There were school finals, then lots of holiday events, birthday parties, and just general busyness. I'm still going to be posting occasionally, but with an even heavier school load this coming semester (starts next week!) I know that it's going to be sporadic at best. I do however actually have a recipe to share- shocking, I know! I had a long list of to-do's for my winter break, half of which of course have not gotten done. Funny how when you still work full time your winter school break doesn't really seem like much of a break. But, I have managed to get some casseroles into the freezer, which was one item on that long list. I even managed to finally make this Everyday Food recipe for Chicken Tetrazzini. This was in the April 2007 issue. Yes, 2007. As in 3, almost 4, years ago now. And it had been on my to-cook list since then. So, I guess this dish did more than double duty- it made two meals, but it also let me cross something off two lists! This recipe was time consuming for me, but I knew it would be so I blocked off a whole evening to make it. It's not that it's terribly hard, but I'm a slow worker and the prep work of shredding a whole rotisserie chicken and cleaning mushrooms took me awhile. It did come out deliciously though, and considering I've got one in the freezer for later I would say the effort was well worth it. I only wish I hadn't waited so long!

Chicken Tetrazzini
Recipe from Everyday Food; Serves 8
Chicken Tetrazzini

Coarse salt and ground pepper
6 tablespoons butter
1 pound white mushrooms, trimmed and sliced inch thick
1/2 cup all-purpose flour
3 cups milk
1 14.5 ounce can reduced-sodium chicken broth
3/4 cup dry white wine
3 cups grated Parmesan cheese
1/2 teaspoon dried thyme leaves
1 pound linguine, broken in half
1 rotisserie chicken, skin removed, meat shredded (about 4 cups)
1 package (10 ounces) frozen peas, thawed and drained

  • Preheat oven to 400. Bring a large pot of salted water to a boil (for pasta). In a large saucepan, melt 2 tablespoons butter over high heat. Add mushrooms, and season with salt and pepper. Cook, tossing frequently, until tender and browned, 8 to 10 minutes. Transfer to a bowl, and set aside.
  • Make sauce: In same saucepan, melt remaining 4 tablespoons butter over medium heat. Add flour; cook, whisking, about 1 minute. Whisking constantly, gradually add milk, broth, and wine. Bring to a boil; reduce to a simmer, and add 2 cups Parmesan and thyme. Season with salt and pepper.
  • Cook pasta 2 minutes less than package instructions for al dente; drain and return to pot. Add sauce, chicken, peas, and mushrooms. Toss well to combine. Divide between two shallow 2-quart baking dishes; sprinkle with remaining Parmesan. Freeze (see below) or bake until browned, about 30 minutes. Let stand 10 minutes before serving.
  • To freeze: After placing pasta mixture in baking dishes and sprinkling with Parmesan (step 3), cool to room temperature. Cover tightly with aluminum foil, and freeze up to 3 months.
  • To bake from frozen: Bake, covered with foil, at 400 degrees, until center is warm, about 2 hours. Uncover, and bake until top is browned, about 20 minutes more. Serve.
  • To bake from thawed: Thaw overnight in refrigerator. Bake, covered with foil, at 400 degrees, until center is warm, about 30 minutes. Uncover, and bake until top is browned, about 20 minutes.
My notes: I didn't thaw the peas. Instead I just tossed them in during the last minute on the pasta's cook time. That did the trick just fine. Also, I bought bags of pre-shredded Parmesan cheese; recipe says grated, but the shredded worked just as well with less prep work from me. Also, I'm sure I've mentioned before, when freezing my casseroles I always wrap it first with plastic wrap and then with aluminum foil. I have to remove the plastic before I can put it in the oven, but I feel like the casseroles keep better this way.

Monday, November 01, 2010

Small Time Cooks Giveaway WINNER!

Thanks for entering my first little giveaway guys! I used random.org's random number generator and got the number 4, which means that Cheryl is the winner. Shoot me an e-mail at jlgweirlaw at yahoo dot com Cheryl, so I can get your mailing address. I probably should have asked people to leave their e-mail address in the comments, right? Oh well, chock it up to beginner giveaway mistakes. Anyway, give me a shout Cheryl and your new cookbook and pancake mix will be on their way to you soon! Thanks again everyone for stopping by the blog to enter!

Photobucket

Monday, October 25, 2010

Small Time Cooks GIVEAWAY!

Photobucket
That's right food-friends, I'm hosting my first giveaway. I noticed the other day that I had over 100 subscribers in Google Reader, so I thought this somewhat random occasion was as good a reason as any to celebrate. Why not, right? So, here's the scoop- as you might have guessed by the pic above, I'm giving away one copy of Everyday Food's Great Food Fast. Everyday Food, as you might have noticed, is my favorite source for great recipes. A collection of their great ideas seemed like the perfect thing for my first giveaway. In addition I'm throwing in some pancakes. Well, not ready-to-eat pancakes, but a jar of my favorite pancake mix. All you need to do is leave a comment on this post and you could be making some pancakes or another great meal out of the great Everyday Food cookbook real soon. I'll accept comments from now until Sunday at midnight. A commenter will be chosen at random, via random.org. Feel free to spread the word and good luck!

Monday, October 11, 2010

A Bit of a Healthier Bite- Whole Wheat Brownies

I noticed this recipe from the September 2010 issue of Everyday Food, tucked into the back of the magazine, and it also ended up tucked into the back of my mind. I don't know if it's been noticeable here, but I love to substitute whole wheat into recipes whenever I can. It's especially easy in pancakes or muffins, but can be a little more difficult with the sweeter baked treats. This time around the recipe did all the work for me, so no worrying about whether or not my substitution would turn out to be a big mistake. I have always been suspicious of baking recipes that include applesauce. I know a lot of people that swear by it as a healthy substitution, but every time I've eaten something baked with applesauce (other than an actual apple dessert) it has seemed noticeable and not all that pleasant. I took a chance anyway, and I'm glad that I did. These brownies are far from being health food, with the butter and of course all that chocolate. But if you're going to make a brownie, and would like to save a couple of calories or sneak in a smidge of fiber, then this is a good recipe to try out. These brownies came out pretty cake like for me, so if thick fudgy brownies are your thing I wouldn't recommend these. I however, am indiscriminate when it comes to brownies. Fudgy, cake, or anywhere in between- I like them all.

Whole Wheat Brownies
Recipe from Everyday Food; Makes 16
Whole Wheat Brownies
6 tablespoons unsalted butter, melted, plus more for pan
1/2 cup all purpose flour, spooned and leveled
1/2 cup whole wheat flour, spooned and leveled
1/3 cup unsweetened cocoa powder
1 1/4 teaspoons baking powder
1 teaspoon salt
1/4 teaspoon baking soda
1 cup packed light-brown sugar
1 1/4 cup unsweetened applesauce
1 large egg
8 ounces semisweet chocolate, coarsely chopped

  • Preheat oven to 350 degrees. Butter an 8" square baking dish; line with parchment, leaving a 2" overhang on all sides. In a medium bowl, whisk together flours, cocoa, baking powder, salt and baking soda.
  • In a large bowl, stir together sugar, applesauce, and egg. Place butter and 6 ounces chocolate in a heatproof bowl set over (not in) a pot of simmering water; stir until melted. Stir chocolate mixture into sugar mixture. Stir in flour mixture. Pour into pan and top with 2 ounces chocolate.
  • Bake until a toothpick inserted in center comes out with moist crumbs attached, 40 minutes. Let cool in pan on a wire rack. Use parchment to lift cake from pan and cut into 16 squares. (Store in an airtight container, up to 5 days.)
My notes: I skipped the whole butter/parchment step and just sprayed my glass pan w/ some nonstick canola cooking spray. I cut my brownies and just popped out one for each of us. I'm storing them in the pan until I pack them up for Josh to take to work. Whole wheat or not, I don't need to eat them all! Also, I used my favorite WW flour, white whole wheat. It's a finer grain that regular whole wheat, so I find it works better for most baking substitutions.

Wednesday, September 29, 2010

Fall Flavor- Lentil and Swiss Chard Soup

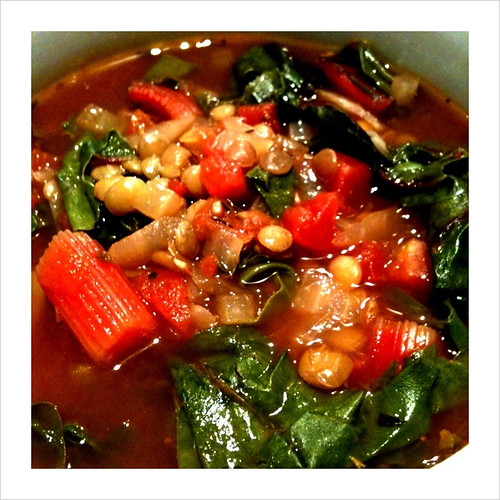
The weather is finally cooling off here and it has been so lovely. It's making me want to do lots of fall cooking, which makes me think of pumpkin, apples, comfy casseroles, and hearty soups. When I'm in the mood for cooking I like to take a look back through my past issues of Everyday Food. This weekend I pulled out all my October issues and did some perusing. I saw this soup recipe and thought I'd give it a go. It came out pretty well, and I'm definitely looking forward to trying more new soups this season.

Lentil and Swiss Chard Soup
Recipe from Everyday Food; Serves 4
Lentil & Swiss Chard Soup
1 tablespoon olive oil, plus more for serving
1 medium onion, finely chopped
1 tablespoon tomato paste
1 teaspoon dried oregano
1 teaspoon dried thyme
1 cup lentils, picked over and rinsed
1 14.5 ounce can diced tomatoes in juice
2 bunches Swiss chard, stalks cut crosswise into 1" pieces, leaves torn into 2" pieces, kept separate
Coarse salt and ground pepper
Juice of 1/2 lemon

  • In a large saucepan with a lid, heat oil over medium-high heat. Add onion and cook, stirring, until softened and browned, 3-5 minutes. Add tomato poaste, oregano, and thyme; stir to combine.
  • Add lentils, 5 cups of water, and tomatoes with their juice; bring to a coil. Reduce heat and simmer, partially covered, 20 minutes. Add chard, stalks and cook until beginning to soften, about 5 minutes. Add chard leaves; season with salt and pepper, and cook until lentils and chard are tender, 15 to 20 minutes.
  • Stir in lemon juice; ladle into bowls. Drizzle with olive oil and serve with bread, if desired.
My notes: I totally forgot about the lemon juice at the end. I was also prepping some veggies for the week and taking peeks at "Glee" while I was cooking, so it just slipped my mind. This soup tasted good without it, although it could use a little bit more kick. Not sure if the lemon juice would do it for me though. Made a batch of cornbread to go with it.

Thursday, September 23, 2010

Reheating Leftovers- Revisiting Cinnamon Oat Pancakes

I had something else on the agenda to share, but I can't seem to find the recipe now. Hardly seems right to share something with you when I can't quite tell you how to make it. But all day I've been thinking about how I should mention these pancakes again. These are my favorite pancakes. Now, I love a fluffy buttermilk flapjack. And I'd never turn my nose up at a blueberry version. But these guys really work hard for me. The cinnamon oat pancake has earned my love.

First, let's start with the fact that these things are pretty darn healthy as far as pancakes go. You've got oats for a nice dose of fiber, and substituting at least half whole wheat flour bumps up the nutritional bonus points. I regularly make these pancakes with soy milk, and using egg substitute would make these babies vegan in no time. The cinnamon and relatively low amount of sugar are just the right combo, no syrup required (though I'd never judge the use of it). And then, you throw in the freezer factor. These fellas freeze beautifully. I wrap them up in pairs in wax paper and pop them all in a big freezer bag. Reheating is a cinch. You could probably toss them in the oven, but I just pop them in the toaster. I usually toast twice, turning in between (that's just a personal tick/habit, probably not all that necessary). They come out warm with a slight crispness to the outside. It's like the best cinnamon toast you've ever had. Way healthier than that sugary cinnamon bread, less mess than sprinkling cinnamon-sugar over toast. Out of the toaster and into my hand for a super easy to eat breakfast. I made a batch prior to the start of the school year, and it's been such a breeze to make sure I eat something before heading off to class. I eat my banana or fruit smoothie while my pancake toasts, then munch on it while I head back to my room and pick out my clothes for the day. One hand for pancake, one hand for grabbing pants, socks, and shoes.

If you've got a big family you'd probably need to make a couple batches to have enough to stock the freezer, but I just don't see how it couldn't be worth it. A nice family breakfast on the weekend, and stock the freezer for weekday mornings? Seems like a no-brainer. If your kid can make a Pop Tart or a toaster streudel, then they can reheat these pancakes.

P.S.- In the original post I imagined that these pancakes would be great with preserves. I was right- they rocked when I recently had them with some homemade peach jam.

Monday, September 20, 2010

Spicing Up Snack Time- Stuffed Jalapenos

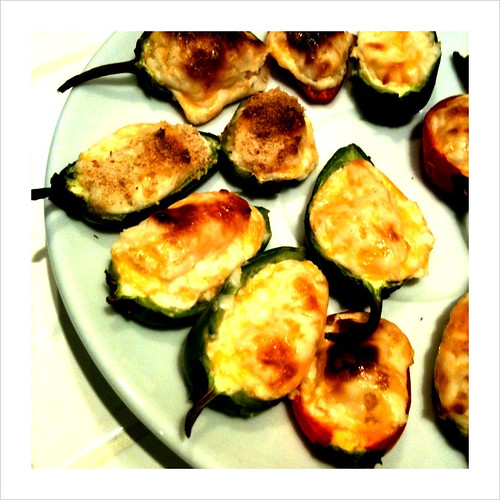
A while back my father-in-law sounded the call and my husband came running. A tree had fallen in their backyard and my husband and his stepbrother went to help him get the big thing chopped up. After a long, hard day of labor my husband was finally able to come home. And he brought with him a few gifts of appreciation for his efforts- mainly produce from their garden and several jars of homemade jam. Among the produce were almost two dozen tiny jalapeno peppers. I wasn't really sure what I would do with so many little ones. Luckily for me I saw this post over on Made By Mike that pointed me in the right direction. I checked out the Stuffed Jalapeno recipe from Everyday Food and decided it would be a great use for them. Petite Pepper Poppers to the rescue! Since my peppers were much smaller than the recipe called for I just had to keep an eye on them while cooking. They came out pretty good though. I'm definitely going to give this recipe a try again, maybe with some different variations on the filling. These would be fun for all those football games that are ahead of us this fall. Also great for parties or an evening of board games. Even, dare I say, a night of television guilty pleasures. Hoarders, anyone?

Stuffed Jalapenos
Recipe from Everyday Food; Serves 4 to 6
Jalapeño poppers
4 ounces cream cheese, room temperature
1/2 cup grated sharp cheddar
6 large jalapenos, halved and seeded
Coarse salt and ground pepper

  • Preheat oven to 450 degrees. In a small bowl, mix together cream cheese and grated sharp cheddar. Season with coarse salt and ground pepper. With a small spoon, fill each jalapeno half with about 1 tablespoon cheese mixture. Place peppers on a parchment-lined baking sheet and cook until cheese is browned and bubbling, about 10 minutes, rotating sheet halfway through.
My notes: I sprinkled a few of the peppers with bread crumbs to add a little crunch. Bacon and ranch mix are two variations that immediately come to mind for this recipe. Enjoy!

Thursday, September 16, 2010

Last Spoonful of Summer- Fresh Corn Spoon Bread

I've been really off the ball in taking advantage of summer produce. This summer seemed just so hot, and so endless. Sure there's a wonderful produce bounty, but just thinking about cooking seemed like hard work in 110 degree temperatures. So I decided I'd better take a stab at something summery before the heat has completely passed me by. When it came time to choose I went with this Fresh Corn Spoon Bread from the September issue of Everyday Food. I felt brave for choosing it, since it required several different steps. And let's face, lately the many steps I've been taking in the kitchen have been from the freezer to the microwave with another burrito. Sad, but true. I decided I'd serve this with some grilled fish and I had some fresh tomato, sliced into wedges with a sprinkling of salt and pepper on the side. Josh passed on the tomato, generally only likes them in a cooked form. However, he loved the spoon bread. He was shocked when I told him it didn't have any cheese in it. He kept referring to it as corn souffle. Eventually I stopped correcting him, and let him go ahead and think I'm a fancier cook than I am.

Fresh Corn Spoon Bread
Recipe from Everyday Food; Serves 6
Fresh Corn Spoon Bread

2 tablespoons unsalted butter, plus more for baking dish
1/2 small yellow onion, diced small (1/2 cup)
1 jalapeno, diced small
Coarse salt and ground pepper
2 cups whole milk
2 cups frozen corn kernels, thawed
1/2 cup yellow cornmeal
4 large eggs, yolks and whites separated
  • Preheat oven to 375 degrees. Butter an 8-inch square baking dish. In a medium pot, melt butter over medium-high. Add onion and jalapeno and season with salt and pepper. Cook until onion is soft, about 5 minutes. Add milk and corn and cook until milk is very hot but not bubbling, about 3 minutes. Whisk in cornmeal and cook, whisking constantly, until mixture is thick, about 2 minutes. Remove from heat and let cool 10 minutes. Whisk in egg yolks.
  • In a large bowl, whisk egg whites until soft peaks form. Fold into corn mixture, then pour into baking dish. Bake spoon bread until browned on top and set in middle, 30 to 35 minutes, rotating dish halfway through. Let cool 5 minutes before serving.
My notes: I used fresh corn, cut from three ears. I didn't really measure, I just figured if two ears usually gives me 1-1.5 cups that three should do the trick. It did taste really good, but I think I could have been a little heavier-handed with the salt & pepper, and my jalapeno seemed to be fairly mild. Would have been nicer with just a little more kick to it. And, I may have slightly over-beaten my egg whites, so keep a close eye. I had to do a little more mixing than folding to weaken them a bit and get things to meld a little better.

Thursday, August 19, 2010

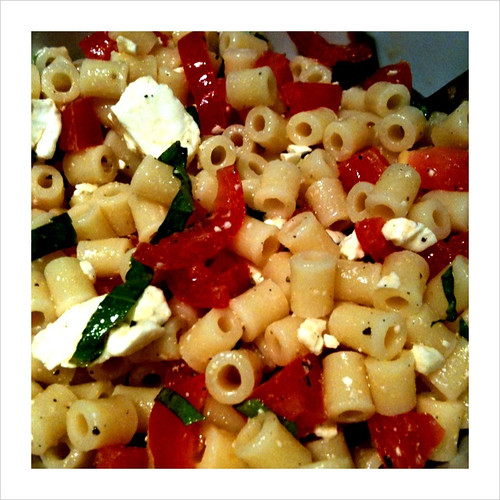
Footloose and Fancy Free- Pasta with Tomatoes & Feta

Why haven't I been eating tomatoes & basil all summer long? I realize that my previous post is also a tomato and basil recipe, so it might appear that my meals haven't been all that deficient. But they have been woefully lacking in this combo, one of the best pairings of summer flavors if you ask me. I'd been thinking about making this for a while, but kept putting it off because the original recipe included shredded chicken and I didn't want to buy any. Then I knocked myself upside the head and said, "Hey dummy, the chicken isn't best part of the meal- it's the awesome combo of tomatoes and basil with the salty feta!" So I chucked the chicken out the window and made some dinner. And honestly, it's made all the easier and slightly healthier for not having to mess with the shredded chicken. I diced my tomatoes and basil, and juiced my lemon, while the water boiled and pasta cooked. Then I was ready to go! Dinner in 15 minutes- that's truly delicious.

Pasta with Tomatoes and Basil
Variation on an Everyday Food recipe; Serves 2
Pasta with tomatoes and feta
Coarse salt and ground pepper
6 oz. ditalini, or other short tubular pasta
1 tablespoons olive oil
1.5 tablespoons fresh lemon juice
1/2 cup (2 oz.) crumbled feta cheese
2 large plum tomatoes, cut into 1/4" chunks
1/2 cup torn fresh basil leaves

  • In a large pot of boiling salted water, cook pasta until al dente, according to package directions. Drain; rinse well under cold water.
  • Transfer to a large bowl; toss with oil, lemon juice, feta, tomatoes, and basil; season generously with salt and pepper. Serve at room temperature or chilled.
My notes: This is a halved recipe so there were two portions for our dinner. I love when recipes can be easily adjusted to fit our two-person household. I'm definitely going to be making this recipe more often, especially since I've started growing my own basil.

Friday, July 30, 2010

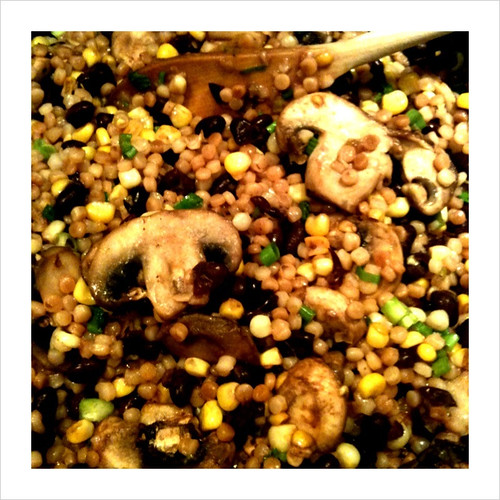
Pleasantly Surprised- Couscous with Black Beans, Corn, and Mushrooms

I figured I had better make a new recipe this week so I'd actually have something put up here. And I am always looking to add some more vegetarian recipes to my repertoire. I went to my usual source, Everyday Food, and noticed this dinner suggestion. It seemed easy enough, and though a little apprehensive about it I figured I'd give it a shot. When I got home Monday night, honestly, the last thing I felt like doing was making a new recipe. I'd have much rather called in a pizza, or tossed a burrito in the microwave. But, I decided to be a big girl and get to work. Especially since I had so many fresh ingredients for the dinner that I didn't want to go to waste. It was my first time cutting corn off the cob- that was a little messy. But overall everything else came together pretty well. And as often turns out to be the case, the recipes I am hesitant about turn out to be the ones I like the most. This had a really great flavor and was really filling. The textures were really nice together. Josh liked it a lot too. He thought it tasted like veggie fried rice. Good to know I can get that flavor without having to twice cook some rice!

Couscous with Black Beans, Corn, and Mushrooms
Recipe from Everyday Food; Serves 4
Coucous with black beans, corn, and mushrooms
2 tablespoons extra virgin olive oil
1 cup Israeli couscous (you can substitute regular couscous or orzo pasta)
course salt and ground pepper
1/2 lb. sliced button or cremini mushrooms
1 small bunch scallions, white and green parts separated and thinly sliced
1 1/4 cups fresh corn kernels (from 2 ears of corn)
1 can (15.5 oz) black beans, rinsed and drained
2 tablespoon fresh lime juice
1 jalapeno, thinly sliced (optional)
1 avocado, halved, pitted, peeled, and sliced

  • In a medium saucepan, heat 1 tbsp oil over medium-high heat. Add couscous and cook, stirring constantly, until golden brown and fragrant, about 4 minutes.
  • Add 1 1/2 cups water, season with salt, and bring got a boil. Reduce heat to low, cover, and simmer until liquid is absorbed and couscous is tender, about 15 minutes.
  • Meanwhile, in a large skillet, heat 2 tsp oil over medium-high heat. Cook mushrooms, stirring occasionally, until golden brown, about 5 minutes. Season with salt and pepper and then transfer to a large bowl.
  • Add 1 tsp oil to the skillet and cook the scallion whites and corn, stirring occasionally, until scallions are soft and corn is browned, about 5 minutes. Season with salt and pepper and then add to the mushrooms.
  • Add couscous, black beans, lime juice, jalapeno (if using), and scallion greens to the mushroom mixture and toss to combine. Season with salt and pepper and serve with avocado slices on top.
My notes: I did not use the optional jalapeno, but others who have shared this recipe online said that they used it and really liked it, so maybe next time I'll give it a shot. Although you can't see it in my photo we did have the avocado with it, and it really did add a lot of complimentary flavor to the dish. I'm tagging this recipe vegan, but is someone knows something about Israeli couscous that I don't, let me know and I'll remove the tag.

Thursday, July 01, 2010

Good Read

We were out of town from last Friday until Tuesday, so things have been very quiet in our kitchen lately. I'll be back, hopefully later this evening, with a fully-fleshed blog post. But in the meantime I wanted to share a new-to-me blog read with you. I discovered Made By Mike through the wonderful world of Twitter, via @MarthasCircle and @everydayfood. You know how I love my Everyday Food recipes, right? Mike shares my EF passion and has recently embarked on an Everyday Food Challenge. Mike is making one recipe a week from his complete collection of Everyday Food magazine issues. He started with issue #1 at the beginning of June, so you don't have too much catching up to do if you'd like to cook along with him. I, sadly, woefully, do not have every issue of EF, but I'm enjoying reading along with Mike's challenge all the same. Maybe once he reaches some of the issues I have I will join along with him! Anyway, I recommend you check out Made By Mike for some fun cooking adventures.

Thursday, June 24, 2010

Fast and Easy Summertime Food- Cornmeal Crusted Fish with Black Eyed Pea Salad

One of the most common search phrases that leads people to this little blog here is either "Cornmeal crusted Tilapia" or "Cornmeal Tilapia". Which the other day reminded me that I had plenty of fish in the freezer and hadn't used this recipe in awhile. I thought I would make and share the recipe again, since it seems to be such a popular one. And on the side I decided to make a really great salad. This is one of the first recipes I tried when Josh and I decided to try eating better, and I still love it. It's really delicious, first off, but it's also really quick to toss together; the corn and bell pepper make it particularly great for the summer. Who wants to spend forever in a hot kitchen during the summer months anyway? Not me. So a quick fish fry up and a no-cook salad is a sure-fire combo for summer cooking success.

Cornmeal Crusted Fish
Recipe from Everyday Food; Serves 4
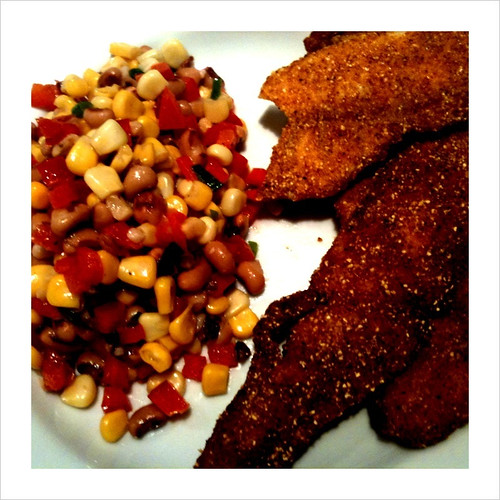
Cornmeal crusted trout w/ black eyed pea salad

1/3 cup yellow cornmeal
2 teaspoons paprika
Coarse salt and ground pepper
4 (6-8 oz. each) skinless tilapia fillets
3 tablespoons olive oil

  • In a shallow dish, combine cornmeal and paprika; season generously with salt and pepper. Separate fillets into thick and thin sides. Dredge each piece in cornmeal mixture, patting it on to coat completely.
  • In a large nonstick skillet, heat 1 tablespoon oil over medium-high. Cook as many pieces as will fit (without crowding) until golden brown and firm, about 2 minutes per side for thin pieces and 4 minutes per side for thick ones. Transfer to a plate; sprinkle with salt, if desired, and cover loosely to keep warm. Wipe skillet with a paper towel. Repeat with remaining oil and fish.
Black Eyed Pea Salad
Recipe from Everyday Food; Serves 4

1 teaspoon Dijon mustard
2 tablespoons cider vinegar
2 tablespoons vegetable oil
1 can black eyed peas, drained and rinsed
1 10 oz. package frozen corn, thawed
1 red bell pepper, ribs and seeds removed, finely diced
2 scallions, thinly sliced
Coarse salt and ground pepper
  • In a medium bowl, whisk mustard, vinegar and oil. Add all vegetables. Season with salt and pepper, toss to combine. Serve room temperature or slightly chilled.
My notes: I used trout that we had in the freezer from my father-in-law, so don't feel like you have to limit yourself to tilapia. I also used this recipe to make some great fish tacos before. Summer puts me in a mood for Mexican, so I'll probably be making those again soon too.

Wednesday, March 17, 2010

Lemony Swiss Chard

I've got a lot on my plate lately, it's just not always something I've cooked. We've decided I'm going to, hopefully, be enrolling in school for the fall and I've got a lot of things to take care of to make that happen. I'm still cooking, just relying more on old standby recipes, which means not so much to share. I did try Rainbow Chard for the first time last week as a really simple side dish. I served it with some Mushroom Risotto and a salad. It was delicious, although I over-salted a little bit. Still trying to figure out how I'm going to keep feeding us healthy home-cooked meals when I'm going to be busier than ever with school work, house work, and work work. That's a lot of work!

Lemony Swiss Chard
Recipe from Everyday Food; Serves 2


1 tablespoon olive oil
1 bunch Swiss chard (about 3/4 pound), stalks cut into 1-inch pieces and leaves roughly torn (keep separate)
Coarse salt and ground pepper
2 to 3 teaspoons fresh lemon juice

  • In a large skillet, heat oil over medium. Add chard stalks, and cook, tossing until crisp-tender, 4 to 6 minutes. Add as many chard leaves to skillet as will fit, adding more as room becomes available; season with salt and pepper. Cook, tossing occasionally, until stalks are tender, 4 to 6 minutes more.
  • Drain and discard any liquid from chard in skillet; stir in lemon juice, and season with salt and pepper.
My notes: I made this with a bunch of Rainbow Chard. Same great taste, but more colorful! It's so nice to find dishes meant to serve 2, too.

Monday, March 01, 2010

Warm Spinach Salad, Version 2

So, as I said in the last post I had some filling/topping leftover from the Mushroom & Spinach Tart. I was making the Warm Spinach Salad later in the week and thought the extra mushrooms and onions I had would work well in it, so I popped the leftovers into the fridge with that purpose in mind. At the end of step three, I added the mushrooms and onions in with the browned potato and let it warm through before adding to the spinach and dressing. This was super delicious, and as I had forgotten to get the shallot for this recipe, the red onion helped make up for that. I think this is a great recipe for this "winter's ending, spring's beginning" time of year. It has a fresh taste with the greens and bright dressing, but it's got a cozy feeling too with the warm potato, Parmesan, and egg. I served it with some sourdough toast and it goes great with a glass of your favorite wine, if you are so inclined (which I was).

Warm Spinach Salad
Recipe from Everyday Food; Serves 4


4 tablespoons olive oil
2 baking potatoes (about 1 lb. total), scrubbed and cut into 1/2" cubes
Coarse salt and ground pepper
2 tablespoons red-wine vinegar
1 tablespoon dijon mustard
1 shallot, minced
2 bunches flat-leaf spinach (about 2 pounds total), thick stems removed, leaves washed well and roughly torn
2 ounces Parmesan cheese, shaved with vegetable peeler
4 large eggs

  • In a large non-stick skillet, heat 2 tablespoons oil over medium heat. Add potatoes; season with salt and pepper. Cook, tossing occasionally, until potatoes are tender and browned, 12 to 14 minutes.
  • Meanwhile, in a large bowl, combine remaining 2 tablespoons oil with vinegar, mustard, and shallot; season with salt and pepper, and whisk to combine. Add spinach and Parmesan (do not toss); set aside.
  • When potatoes are done cooking, immediately transfer to bowl with spinach and dressing (reserve skillet). Toss salad until spinach is slightly wilted, and divide among four plates.
  • Heat skillet over medium, and gently crack eggs into skillet without breaking yolks. season with slat and pepper. Cook until whites are almost set, about 1 minute. Cover, turn off heat, and let stand until whites are just set but yolks are still soft, about 2 minutes more. Top each salad with a fried egg and serve immediately.
My notes: I halve this recipe for the two of us, using one potato and a pre-washed bag of spinach to save time.

Monday, February 22, 2010

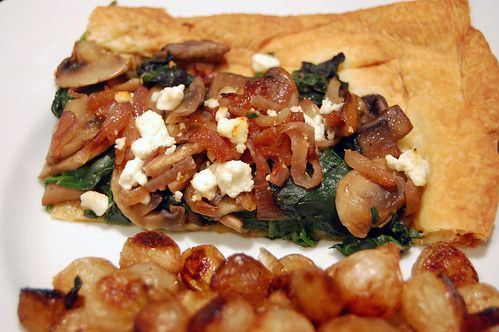
Mushroom & Spinach Tart

Amazingly I have another recipe to share. So soon! I can almost see your looks of astonishment. Whose to know that I actually made this, like, a month ago? Well, I guess whoever reads this now that I spilled the beans. This recipe was somewhat a success. If you ignore the fact that I have terrible luck handling puff pastry (any kind of pastry dough really, I think it can sense fear) then it was indeed successful. It was edible, which is really the true test of a recipe, right? This is, of course once again an Everyday Food recipe, but I came across it when Tracy at Shutterbean shared it. I have a thing for mushrooms for some reason these days, so this recipe really appealed to me. I don't think I ever got the dough to really roll out properly, so I ended up with extra filling, topping, whatever you'd like to call it. But I put it to good use in a variation of an old recipe that I'll share with you soon, so no complaints about that. My only complaint is I have the other half of the puff pastry package in the freezer and I think it is well aware of my insecurities. I hate it when my groceries get the upper-hand.

Mushroom & Spinach Tart
Recipe from Everyday Food; Serves 4


Flour, for rolling out puff pastry
1 sheet frozen puff pastry, thawed according to package instructions
1 medium onion, halved and thinly sliced
2 tablespoons olive oil
Coarse salt and ground pepper
2 10 oz. packages white mushrooms, trimmed and thinly sliced
1 10 oz. fresh baby spinach
2 oz. soft goat cheese, crumbled

  • Preheat oven to 400 degrees. On a floured surface, roll the puff pastry out to a 16" x 10" rectangle. Trim uneven edges. Place the pastry on a baking sheet. With a sharp knife, lightly score dough to form a 1" border. Using a fork, prick dough inside the border every 1/2". Bake until golden, rotating pan once, about 15 minutes or until tender.
  • Meanwhile, in a small saucepan with a tight-fitting lid, toss onion with 1 tablespoon oil. Season with salt. Cover and cook over medium heat until onion begins to brown, about 5 minutes. Stir. Continue cooking with cover on for 15 minutes, stirring every 5 minutes. Set aside.
  • In a large saucepan with a tight-fitting lid, heat remaining oil. Add mushrooms; cover and cook until tender and all liquid has evaporated, about 10 minutes. Fold in spinach; season with salt and pepper. Cover and cook until wilted, about 5 minutes more. Drain any liquid.
  • Top dough with mushroom-spinach mixture. Scatter onion and goat cheese on top. Bake until cheese is lightly browned, about 15 minutes.
My notes: I used feta for the cheese, because I use feta every chance I get. Why wouldn't you? It's fetastic. You like that word I just made up? And I served some Balsamic-Roasted Pearl Onions on the side. Yes I realize that means we had two kinds of onions in this one meal. I love onions so, again, why not? Don't worry- I haven't created any words for onions. Yet.

Tuesday, February 16, 2010

Berry Muffins

Look! I actually cooked something! Well, baked technically. I have been in a mega-funk lately and any effort into cooking is usually one of the first things that goes when I am. I just want to come home, eat chips & salsa, and sit in front of the telly. This past week though we had a bit of a blizzard, with over a foot of snow in some areas. Being stuck at home gave me a little more impetus to do something in the kitchen, so I looked around for a recipe that would work with what I had on hand and found this one from, where else, Everyday Food. This is a basic muffin recipe to which you can add mix-ins, such as berries like me, or chocolate chips, nuts, dried fruit, etc. These came out great and not only made a yummy late breakfast snack, but were good warmed that evening with a little homemade ice cream too.

Better Than Basic Muffins
Recipe from Everyday Food; Makes 12


3/4 cup (1 1/2 sticks) unsalted butter, melted, plus more for pan
2 cups all-purpose flour, spooned and leveled, plus more for pan
2 large eggs
1/2 cup whole milk
1/2 teaspoon pure vanilla extract
3/4 cup granulated sugar
2 teaspoons baking powder
1/2 teaspoon salt
mix-ins
2 tablespoons sanding sugar (optional)

  • Preheat oven to 375, with rack in lower third. Butter and flour a standard 12-cup muffin pan, tapping out excess. Set aside.
  • In a small bowl, whisk together butter, eggs, milk, and vanilla; set aside. In a large bowl, whisk together dry ingredients; make a well in the center. Add egg mixture to well. With a rubber spatula, gently stir ingredients just until batter is moistened. Do not over-mix; a few lumps are fine). Add mix-ins, if desired.
  • Spoon batter into prepared muffin cups, filling each about two-thirds full, sprinkle with sanding sugar, if desired. Bake until a toothpick or fork inserted in center of a muffin comes out clean, 15-20 minutes. Loosen muffins, and tip them on their sides to cool in pan. Serve warm or at room temperature.
My notes: I used 1 cup AP flour and 1 cup white whole wheat, and I substituted soy milk since that's what we had. I added 1 cup of mixed frozen berries into the batter at the end of step two. And I topped each muffin off with a sprinkling of red decorators sugar for Valentine's Day. Also I baked these in muffin cups that I spritzed with cooking spray instead of buttering and flouring.

Monday, January 25, 2010

Sauteed Escarole

It would seem that I've been working under another theme recently, although it wasn't quite as intentional as Harvest Month in November. You may have noticed that I'm on a bit of a greens kick. I guess the bug to try new things is still biting me, and the start to new year has had me thinking about trying to eat healthier and more seasonally. I am actually finding that to be a bit difficult, considering I've grown up in a world where tomatoes are always in the supermarket, be it spring, summer, winter or fall. But I am trying, and after reading about greens in one of my recent Everyday Food issues I decided I should put a little focus on them. So, this is the third recipe I've tried recently involving greens, the other two being posted below. I'd say this one was the simplest, although none of them have been terribly difficult, but it has also been the most delicious. I'd definitely make this recipe again, and it's nice to have more side ideas for the winter time to help balance that yearning for heartier foods in the cold weather. I served this with some grilled fish and rosemary roasted potatoes.

Sauteed Escarole
Recipe from Everyday Food; Serves 4


2 tablespoons olive oil
3 garlic cloves, peeled and smashed
2 small heads escarole (about 1 pound total), trimmed, leaves torn and washed well
coarse salt

  • In a large skillet, heat oil over medium. Add garlic, and cook until fragrant and lightly golden, about 3 minutes. Stir in escarole; season with salt. Cook, stirring frequently, until tender, about 10 minutes.
My notes: Simple enough, right? I used one medium sized head to make two servings for our dinner. This would probably be quite good with a squeeze of lemon juice too, but I marinated my fish in lemon juice, olive oil, garlic and pepper for a nice complimentary flavor.

Tuesday, December 22, 2009

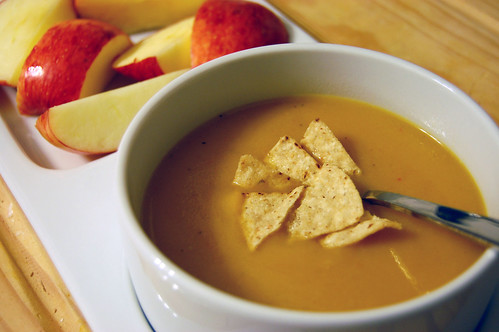
Butternut Squash & Chipotle Soup

EDIT: NOW WITH PHOTO! Well, I forgot once again to upload the photo for this recipe, but I thought I'd go ahead and get this post up and add the pic when I get home tonight. I've got a lot on my holiday plate this week, and if I wait until I get home to do the whole thing then it just won't get done! This recipe is an adaptation of the Sweet Potato & Chipotle Soup from the December issue of Everyday Food. Tracy at Shutterbean recently gave it try, and subsequently two thumbs up. I thought this might be a great recipe to adapt so I could use the other half of the butternut squash I'd bought. This was my first attempt at making a squash soup and gladly it came together quite easily. That also meant it was my first time to eat a squash soup, Josh's too. It was really good, I was impressed. That said, it's a cup kind of soup for me, not a bowl. I can't eat too much of it in a sitting before I'm longing for a bit more texture. But it was good, and I would definitely use it as a first course in the future.

Butternut Squash and Chipotle Soup
Adapted from Everyday Food; Serves 4


1 tablespoons olive oil
1/2 medium white onion, chopped
coarse salt & ground pepper
1 teaspoons ground cumin
1 lb. butternut squash, peeled and cut into 1 inch pieces
1 cloves garlic, minced
1/2 whole chipotle chili in adobo, chopped
3.5 cups of low sodium chicken broth
Tortilla chips, for serving

  • In a large Dutch oven or heavy pot, heat 1 tablespoon oil over medium high heat. Add onion, season with salt and pepper, and cook until beginning to brown around the edges, about 5 mins. Add cumin & garlic and cook, stirring until fragrant, about 1 min. Stir in squash, chile, and broth. Bring to a boil; reduce to a rapid simmer, partially cover and cook until sweet potatoes can be mashed easily with a spoon, 20 to 25 mins.
  • Let soup cool slightly. Using an immersion blender, or a blender working in batches, puree the soup. Season with salt & pepper and serve.
My notes: This is a halved version of the original recipe, which served 8. I adjusted for our household size, and for the amount of squash I had on hand. I topped my soup with some broken tortilla chips, which added some texture and a little something to help with the spicyness. I love finding a use for those little chippies at the bottom of the bag!

Tuesday, December 15, 2009

Roasted Fall Vegetables

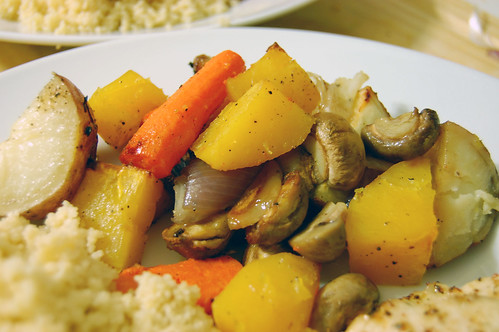
While I seem to have a lot of irons in the fire lately- photography class, learning to Charleston, all those holiday activities- I've been feeling more and more like cooking new things. My cooking mojo, while laying dormant for some time, seems to have returned. Last week I decided I wanted to try cooking with another new-to-me food and I chose butternut squash. But since I am so busy lately I needed it to be a fairly easy recipe. We've got a freezer full of fish we received from Josh's dad, so I decided a side dish to go with some quickly grilled trout would be perfect. I went way back to an October 2006 issue of Everyday Food for this recipe. It was so, so good. Really, I don't know how you could expect some veggies you just stick in the oven and practically ignore to come out so good, but I guess that's the miracle of fresh produce. Along with the grilled trout I made some whole wheat couscous. This meal was so filling, but so good and I was more than glad to eat a lunch of leftovers the next day.

Roasted Fall Vegetables
Recipes from Everyday Food; Serves 8
Roasted Fall Vegetables

2 pounds (about 1 medium) butternut squash, peeled, seeded, and cut into 1 1/2-inch pieces
2 pounds red new potatoes (12 to 14), well scrubbed and quartered
1 pound medium red onions (about 2 to 3), peeled and quartered
1 pound carrots (6 to 8 medium), halved lengthwise, if thick, and cut into 1 1/2-inch lengths
4 to 6 garlic cloves, peeled and smashed
3 tablespoons olive oil
Coarse salt and ground pepper

  • Preheat oven to 450 degrees. Divide vegetables and garlic between two rimmed baking sheets (or line with parchment paper, if desired, for easy cleanup); dividing evenly, toss with oil, 2 teaspoons coarse salt, and 1/4 teaspoon pepper.
  • Roast until vegetables are tender and beginning to brown, 40 to 50 minutes, tossing them and rotating sheets from top to bottom halfway through. Serve hot or at room temperature.
My notes: I halved this recipe, so I didn't have to bother with rotating sheets. And I had some mushrooms leftover from a recipe earlier in the week so halfway through, when I tossed the vegetables, I added them in too. The butternut squash was a pain to peel with my crappy peeler, but all was (almost) forgotten when I tasted the roasty golden chunks. This recipe used only half of the small butternut squash I bought, and I used the rest in a recipe last night that I'll be sharing soon.

Related Posts with Thumbnails